Thursday, April 8, 2010

Creating Sample ETL using Informatica 8.6- Part -3

Step : Creating WorkFlow Mappings
Pre-requiste: Create ODBC so that tables can be reverse engineerd.

1. Start the Informatica Desinger using Start-->Programs-->Informatica Power designer 8.6-->Client--> Power Center Designer

2.Connec to the repository by giving the repository user name and password.

3.Click Tools--> Source Analyzer

4.Click on the Sources --> import from Database menu

5. Give the datbase user name and password, click Connect


6. Select the table and press OK to import the table into source Analyzer pane.

7. Click on Tools--> Targer Designer menu

8. click on Targets--> Import from Database menu

9. Connect to database after giving target user naem and passowrd and press Connect button

10. Select table and press OK button which will import the table into target analyzer pane.

11. Select the mapping Designer by selecting Tools-->Mapping Designer

12. Drag the Source table from Source folder into Mapping Designer.It will prompt you to enter teh mapping name. Give a valid mapping name.

13. Drag the Target table from Target folder into Mapping Designer.


14. Map the columns from Source Qualifier to the target by clicking on teh column Source qualifier and dragging the selected column to the target column.

Now the mappings been done, We have to genereate Workflow as next Step.

Creating Sample ETL using Informatica 8.6- Part -I

Step: Informatica Adminstration Tasks for creating Services

1.Install the Informatica 8.6

2.After installing , Start the Informatica Services


3.After this the following services will be started


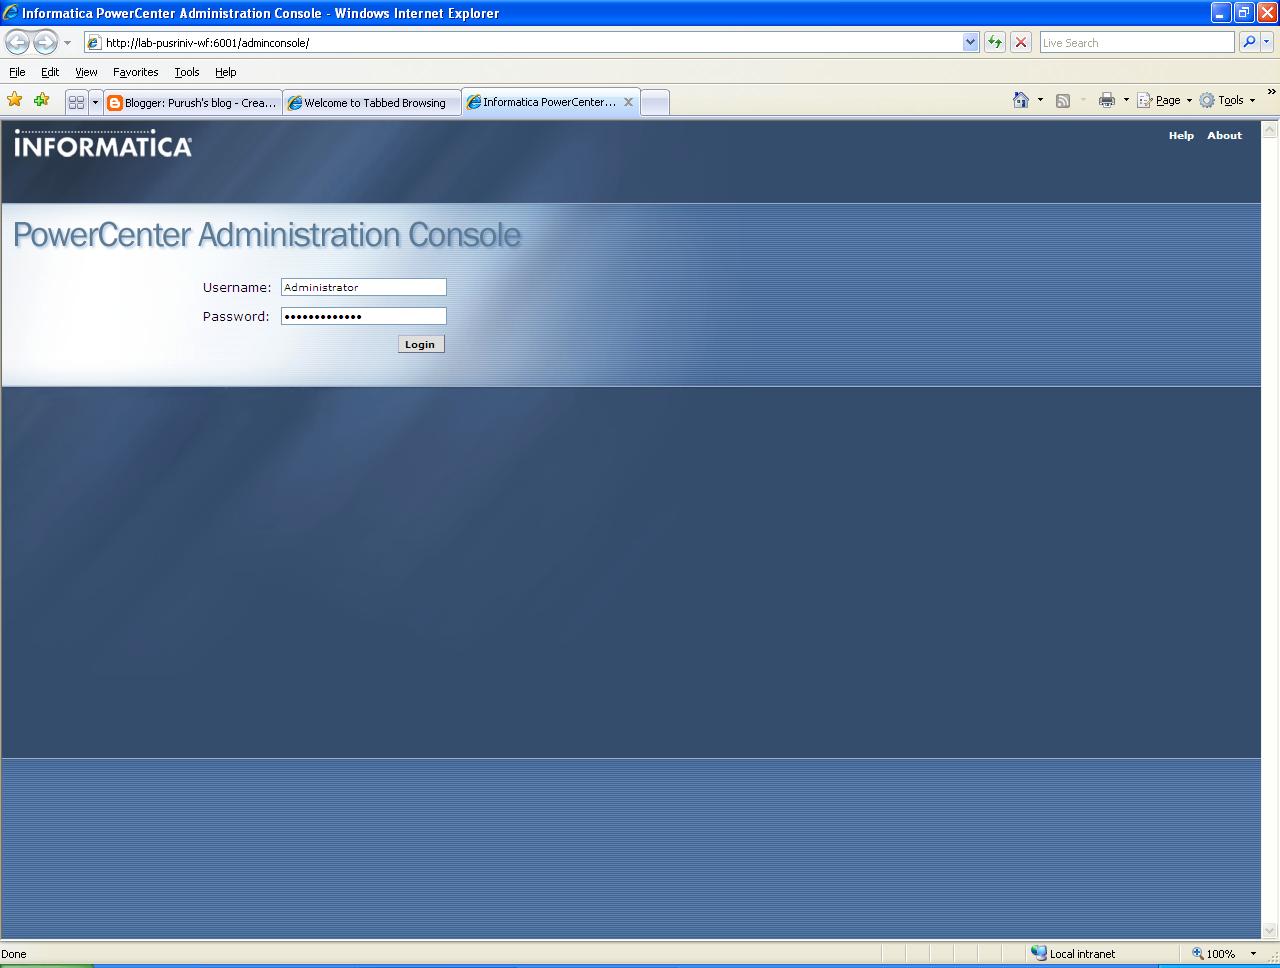
4.Start the informatica Power ceneter Administration console
Start--> All Programs--> Informatica Power Center 8.6-->Services --> Power center Administration console.

Following Screen appears


5. Login using user name and password .
Note this is given during installation time.
Default user name : Administartor
Password : Administrator

6. Click on Admin console menu on the welcome screen


7. Create a oracle database user to hold the repository.

8. Create Repository Service by clicking


9. Fill the necessary details in following screen to create teh repository service

Service Name: Name of the repository service to be created
Connect String: service name pointing to the db
User name: user name created in step7
Password : Password created in Step 7

10 Stop the repository service and restart again so that Integration service can be created.

11. Create the Integration Service by clicking Create-->Integration Service menu.

Repository user name: User who have been already created in informatica security manager.
Password : password of the informatica user


12. Assign the privileges the repository user for the newly created repository by clicking configure Security icon on the right corner.


13. Click on the Roles Tab and select the check box against the created repository.


14. Similarly click on teh Privleges tab and select the check box against the repository name so that all privleges is granted for the user.

goto next step

Wednesday, March 10, 2010

how to store extremely large files>

its very common for most of us to find a place to back up our data. Gone are the days when we used to back up data using USB, External HDD etc. Now many companies are offering free and paid service to storing up the data online. While goin through following link found that this is quite informative.
http://news.cnet.com/8301-27076_3-20000133-248.html?tag=rtcol;pop

Thursday, July 9, 2009

Solution for ORA-01157

Recently while dropping the database some of my other datafiles gone missing. Because of this when trying to open the database got an error "ORA-01157 - Cannot find lock for the file D:\oracle\Oradata\Oradesigner\Designer" and the database is not at all opening

Solution
1. Login to database as / as sysdba
sqlplus > connect / as sysdba
SQL*Plus: Release 9.2.0.8.0 - Production on Thu Feb 8 14:54:38 2007
Copyright (c) 1982, 2002, Oracle Corporation. All rights reserved.
Connected to an idle instance.

sqlplus > startup mount;
ORACLE instance started.
Total System Global Area 236404368 bytes
Fixed Size 724624 bytes
Variable Size 201326592 bytes
Database Buffers 33554432 bytes
Redo Buffers 798720 bytes
Database mounted.
sqlplus > alter database datafile 'D:\oracle\Oradata\Oradesigner\Designer' offline drop;
Database altered.
sqlplus> alter database open;
Database opened

Tuesday, April 21, 2009

Changing the Default Gateway using Command prompt

The command is:
to change IP and default gateway:
netsh int ip set address "local area connection" static 192.168.0.101 255.255.255.0 192.168.0.254 1

to change DNS:
netsh int ip set dns "local area connection" static 192.168.0.254 primary

This is assuming 3 things.
1) The network adapter you're trying to change the IP for is "local area connection". It could also be "local area connection 2" or "wireless network connection". Look in your control panel for the correct name
2) The IP you want to set is 192.168.0.101, change this to whatever IP to want to use.
3) The default gateway and dns are the same IP. If you are using some kind of router they usually are. Change this to match your network config found with the command ipconfig /all

You will need to run both commands to change the IP.

Friday, May 23, 2008

Creating - Oracle DB Links

1. Log into the db from which the query will be executed.
2.create public database link using
ex Create Database link db1_link using db1_machine1
3. Database link is created

Common Problems
===============
1. When global_names parameter set to TRUE then default domain name 'REGRESS.RDBMS.DEV.US.ORACLE.COM' is appended at the end of the dblink name and will cause ORA-02805 error.


Changing global names
================
Alter system set Global_names =false;

Thursday, March 27, 2008

Date Queries in MS Access

Writting query in MS Access for Date column differes from other SQL formats. For eg Writing the sql in ORACLE you will follow this patterrn

Select First_Name, DOB from emp where dob='01/jul/2008'

whereas in Access it has to be written like this
Select First_Name, DOB from emp where dob=#01/jul/2008#

Access understands the literals enclosed within # as date.